Thursday, January 29, 2015

Magic Antibiotic Cream

Pin It Now!


Well, it's been a very, very long time since I've posted. I've been spending most of my time over at my Growing4Life blog, encouraging people to dig into God's Word. It's also a little crazy around here with two weddings in the works for this upcoming summer! I have a son and a daughter getting married 6 weeks apart!

But when someone asked me to share my Antibiotic Cream recipe, I knew I had to get it on this blog. Let me say first that this stuff is truly amazing. We use it for just about everything-- cuts, scrapes, burns, fungal infections, and rashes. My daughters even use it for zits! And it really works!

If you are interested in moving away from store-bought chemical-laden, synthetic remedies, this is a great place to start.

INGREDIENTS--

1 1/2 oz  Bee's Wax Pellets

1 cup  Organic Coconut Oil

1/4 tsp  Vitamin E Oil

1/2 tsp  Tea Tree Oil 

20 drops  Organic Lavender Oil

10 drops  Organic Lemon Oil

5 drops  Helichrysum Oil


DIRECTIONS--

Put Coconut Oil and Bees Wax into a microwave-safe quart-sized measuring cup. Microwave until pellets are melted, stopping every 30 to 45 seconds or so to stir. When it is completely liquified, add the oils. Pour into clean jars or plastic container.

NOTES--

*I usually pour some into lip gloss containers, creating some "travel" sticks that are very handy to keep in my purse or car.

*I have included links for you to click over to Amazon to purchase the necessary supplies for this. And, YES! It is an expensive investment-- if you think about what you are spending today. What you have to remember is that you are buying enough to make many, many recipes of this. And what you will find is that many of these supplies are used in many homemade recipes, so the oils and other things I buy really never stick around for long and I've saved a tremendous amount of money in making so much myself.

*Store this in a cool, dry place and it should have a shelf life of 4-5 years-- although if you use it as much as we do, it will never be around that long! 


Monday, August 18, 2014

Roasted Tomato Soup with Fresh Basil

Pin It Now!

A few years ago, I came across an Amish Paste tomato plant and it quickly became my favorite variety to grow in my garden. My family isn't big on fresh tomatoes, so I thought I would give these cooking tomatoes a try. And I was not disappointed! They are wonderful, meaty tomatoes -- perfect for salsa, sauces, and soups. But they yield a LOT. So I usually find myself trying to figure out what to do with them all!

This recipe was on my local vegetable co-op's newsletter and I thought I would give it a try. I changed it up a bit but not a whole lot. It was really yummy and I highly recommend trying it if you have extra tomatoes! I would imagine that any variety of tomato will work.

INGREDIENTS--

Fresh Tomatoes (5 -7)
1 Small Onion
2 Garlic Cloves
2 Tbsn Olive Oil
1 tsp salt
1/4 tsp pepper
A handful of basil, chopped

Place tomatoes, onion, and garlic in a greased jelly roll pan and drizzle with oil. Sprinkle with salt and pepper and then toss to coat. Bake at 400 degrees for about 25-30 minutes or until tender, stirring once. Cool slightly.

Process in a food processor or blender (adding basil at this time) and then transfer to a saucepan and heat through. (You may want to peel the tomatoes before throwing them in the blender. I will definitely remove the peels the next time I make it.)

Once it is heated through, spoon into bowls and top with cheddar cheese and croutons. Enjoy!


Saturday, July 5, 2014

Summer Berry Trifle

Pin It Now!

Do you need a last minute dessert for the holiday weekend? This is really easy and tastes delicious! I couldn't find this posted anywhere else, so I am posting it here. We based this loosely on another recipe we found and came up with this one. My daughter is the one who actually put it together and it was yummy!

INGREDIENTS:
2-3 quarts of mixed berries (we used strawberries, blueberries, and raspberries)
1 angel food cake (home-made, from a box, or ready-made from the store)

For filling--
 2 1/2 cups powdered sugar
2 (8 oz) cream cheese
1 tub of Cool Whip (or 12 oz whipped cream)
1 tsp vanilla

1. Set aside a few berries as garnish for the top of the trifle. And then mix remaining berries together (slicing strawberries first). Add a bit of sugar, if desired.
2. Mix powdered sugar and cream cheese together in a large bowl until creamy. Fold in the cool whip and vanilla.
3. Cut the cake into cubes.
4. Layer into trifle bowl (or other clear bowl) in this order: cake, filling, berries. End with filling.
5. Arrange your final layer of berries on top.

Enjoy! Happy 4th of July!

Sunday, June 8, 2014

Coconut Shrimp Salad

Pin It Now!

So one of the really wonderful things about summer is the fresh salads! There is no end to the possibilities for creating delicious salads. I especially love the fairly recent idea of adding fruit to salads. A few weeks ago, I decided to come up with my own and was actually rather surprised at just how good it was! I am pretty sure that if you try this, you will love it! And it's just soooo easy.

INGREDIENTS (for individual serving)--

2 Large handfuls of Spinach
1 Champagne Mango
1/2 cup of Blueberries
5-6 Coconut Shrimp (easy and delicious recipe found here. Make plenty so that it is easy to throw salads together for the rest of the week.)

Throw it all together and add a couple tablespoonfuls of The Best Poppyseed Dressing Ever. This is my favorite dressing for any salad containing fruit and is easy to make with just a few ingredients.

That's it! Let me know you like it. :)


Tuesday, April 15, 2014

A Spring-Themed Bridal Shower is Fun to Plan!

Pin It Now!

Wow. I haven't written here for almost a month. And a crazy month it's been! By far, the most exciting thing we did this past month is plan a bridal shower for my oldest daughter. She is getting married in June and we wanted to hold a surprise shower for her. My younger two daughters and my mom were my partners in crime ;) After some discussion, it was decided that we would hold a spring-themed shower in the restaurant owned by the couple my engaged daughter works for. With lots of help from this wonderful gal, we were actually able to surprise my daughter and pull off a fun, enjoyable afternoon. I thought I'd share some of our ideas here, as people seemed to thoroughly enjoy the day. Some of the ideas were from Pinterest and some were just from our own heads. I hope you enjoy the pictures!

One of my daughters found the fun idea of having four themed tables-- Old, New, Borrowed, Blue.

This is what we did with each one--

"Old" Table --we filled this table with pictures of the bride and groom. We hung most of them on a beautiful, live Magnolia bush which we gave to the couple as a gift.


 "New" Table-- this table was filled with gifts for the bride--lovely new things with which to fill her home. 


 "Borrowed" Table-this table was filled with advice and recipes, borrowed from those who love the bride (and groom, too).


We asked people to write their advice on flower cut-outs that we had attached to paper straws and placed in small vases, They looked like cheery, bright bouquets on the table. 
"Blue" Table--This one stumped us a bit. We didn't really like any of the ideas we saw on Pinterest. And so we decided to just ask people to bring a small blue household item. The table was filled with cleaning supplies, sponges, duct tape, etc.  All of that little stuff that costs so much money and no one usually buys for the bride.


After we decided on table themes, our next item to plan was games. What should we do? What we discovered was that Etsy was filled with great ideas for Bridal Shower games. I was all set to purchase some digital designs to print on my own, when I realized that with some clip art and digital scrapbook paper purchased from Etsy, I could easily design my own games. Here is what I was able to create, using Microsoft Publisher--


I absolutely love to do this kind of stuff but I realize that it would be very overwhelming for some of you. If that is the case, then use Etsy! They have amazing options for bridal showers and baby showers and birthday parties. Really, it is an absolute treasure trove of fun designs that can be purchased at a minimum price (if you print your own). 

Last, but certainly not least, was the food. We arranged with the restaurant owner to provide most of the main meal (wraps, fruit, salads, and chips) and then started planning our dessert table. My son's girlfriend loves to bake so we lined her up to make cupcakes that went with our theme colors. She made key lime, strawberry-filled, and vanilla cupcakes. My niece made matching cake balls in chocolate and vanilla. And my daughter rounded it out with adorable, heart-shaped rice krispies and white chocolate snack mix, using Easter colored M&Ms. Here are a few shots of the dessert table--


heart-shaped rice krispies

white chocolate snack mix with Easter m&ms

key lime, vanilla, and strawberry-filled cupcakes


And that's about it. My daughter tells me that she was truly surprised (which was an accomplishment in and of itself since she still lives with us!) We enjoyed an afternoon of fellowship and fun. It was the official beginning to a season of excitement and new experiences for my daughter, as she prepares to embark on the adventure of marriage. My husband and I see God's hand very clearly in bringing her and her fiancee together and we are so happy for them!

Thanks for taking the time to check out our bridal shower. Here is a final picture of some young people thoroughly enjoying themselves at the shower--


Tuesday, March 18, 2014

Never Buy Expensive Granola Again!

Pin It Now!

After spending $5 on a {very} small bag of granola that promised to be made of all-natural ingredients, I started thinking. The granola was gone in a matter of days and the price for the amount in the bag hardly seemed a smart purchase. Surely this should be something I could make?

And, so, like usual, I started experimenting. I found a recipe, made a couple of changes, and came up with this recipe. It's delicious, I know exactly what's in it, and it is at a fraction of the cost. And, as an added bonus, it is SO easy to make and doesn't take very long. Here is the recipe--

Ingredients:
5 cups old-fashioned oats
1 cup quick oats
1 cup flaked coconut
1 cup brown sugar
1 cup walnuts
1 Tbsn cinnamon
1/2 c water
1/2 c grapeseed oil
1 Tbsn vanilla

Directions:
Preheat oven to 325 degrees. Mix oats, coconut, sugar, walnuts, and cinnamon together in a large bowl. Stir water, oil, and vanilla into mixture. Spread onto baking sheet and bake for 1 hour (or until golden brown and crunchy), stirring every 15 minutes.

Please note: You can add raisins, dried fruit pieces, or chocolate chips to the mix after it is finished baking and has cooled a bit.


Monday, March 10, 2014

Keeping Greens Green

Pin It Now!

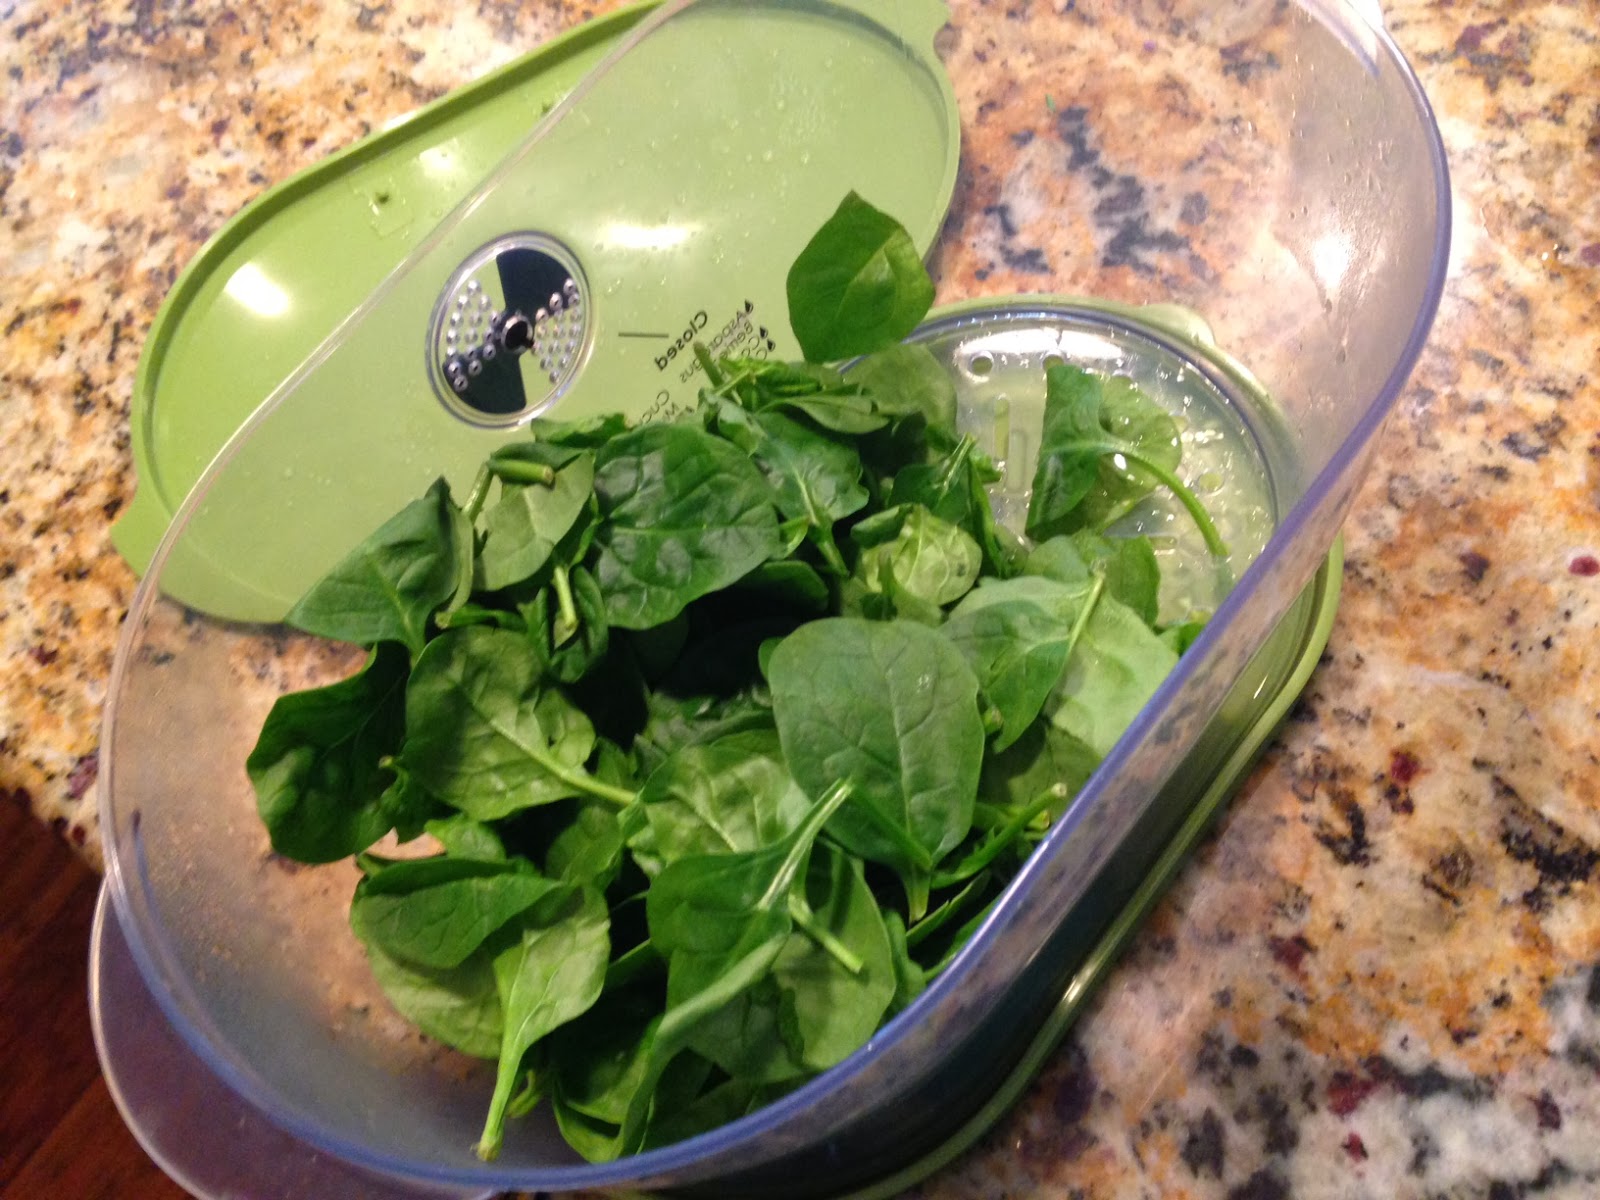
Any time I make a concerted effort to eat healthy, I find myself confronted with the short life-span of the greens that are supposed to be so good for me. Do you know what I mean? Is it just me or do lettuce and spinach start wilting the moment I put them in my shopping cart? Seriously, after only a couple of days in my refrigerator they have most likely turned slimy and gross. There is not much grace in the greens department when it comes to storage. Especially if you go the pre-cut, prepared route.

At least there wasn't much grace before I found the Prepworks Lettuce Keeper. This thing is truly amazing! I do not promote anything that doesn't work on this blog. The picture above-- the spinach you see there? It is TWO weeks old today! I took that picture this morning. It is still crisp and fresh. I am truly amazed and have been since I've been using the lettuce keeper the past couple of months.

This keeper saves me money and helps me to eat healthy! I am so excited about this that I just ordered the Berry Keeper, as well. I will let you know if that works as well as my lettuce keeper!